Drawing Academy X
The Drawing Process Part 2 — Inking
After I finished the pencils for a panel I was working on, I usually got up to take a two minute break. After 45 minutes to an hour of work doing the pencils, I needed a break so that I could start the inking -- a completely different process -- with a fresh head and a relaxed hand.
First inks.

For inking, I used a permanent, waterproof black ink by Higgins called Black Magic, which is a really superb drawing ink: very nice matte black color, opaque and permanent. There's always an aesthetic joy I get from drawing a line of pure black ink onto a pure white piece of bristol paper. There's just something cool about it.
Another joy is using the kind of crow-quill pen nibs that I use. I spent a number of years using some random ones that I bought in sample packs, and even some ones that I inherited from my maternal grandmother, who was an artist. Then I decided to try using Hunt 102's, which were recommended by Dave Sim (Cerebus). The first time I drew a line with one, I knew I'd found my nib. A friend of mine complains that they're really stiff, too stiff for him to work with, but I think the stiffness works for me because of my rather heavy-handed drawing style. I have really big hands, and I apply a lot of force when I draw, and the 102 has enough resistance to stand up to it and come out with a nice, clean-looking line where a different nib would splay out a big fat drippy kind of line. A nib is just a thin piece of metal, and once the tips of the nib get splayed, it doesn't hold or dispense ink properly any more. (There are also some nibs that are bad right out of the box, which is annoying. Some of them tend to have scratchy edges that ruin the paper as I draw, instead of running smoothly over it, and so forth.) I got maybe a panel of ACX or so out of a Hunt 102 quill before it'd be shot.
Just like with the penciling, I started inking with the characters, and then I inked the backgrounds on a separate pass. I worked on each character at a time, going left to right. And the first thing I inked for each character was that character's eyes, starting with the pupils, then the upper and lower lids. Then I kind of fanned out according to whim, doing the eyebrows, nose, mouth, chin, hair, ears; I finished the head before I moved onto the rest of the body. (I started with the eyes because they're a detailed bit that needs to be done right -- and with a nib at its freshest -- if you put the pupils in the wrong place, the character seems to be staring off into space instead of at whatever he's supposed to be looking at, and that kind of thing.)
Details.
It's a good idea, in theory, to put down in pencil all of the details that will end up in ink in the final drawing. In practice, however, I tend to let some details slide, mainly using the pencils to get the broad strokes in place, leaving the details for the inking stage. The following examples illustrate the difference between the sometimes sketchy nature of my pencils as opposed to the final product.
In this first panel, the background is rendered as a few hasty lines, and the characters are defined in varying degrees of precision. However, you can see that my priority in the pencilling was to capture the characters' body language and facial expressions, which remain mostly intact after inking. (Although, I always thought that I had given Wanda a faraway look in the pencils that I failed to preserve in the inks.)
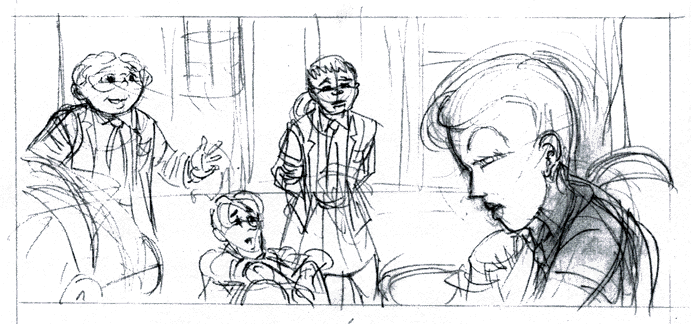 Fig 5a. Some sketchy pencils for a panel, just before inking. |
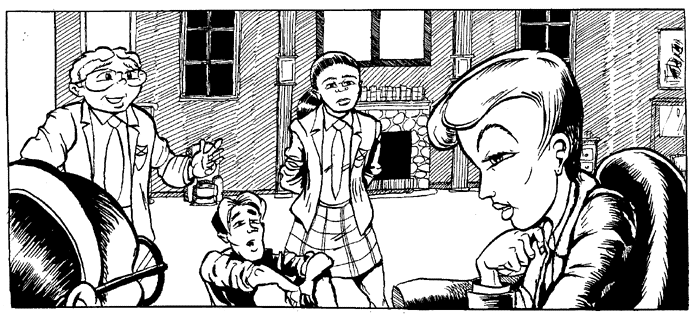 Fig 5b. The final result. |
Several times I was asked to draw crowd scenes. It is tedious enough drawing a crowd full of people and all their faces and fingers and shoelaces once, but twice is quite a chore. So, I just made sure I got all the bodies laid in, and worried about the details later on. You might also note, in this next example, my use of perspective lines on the building.
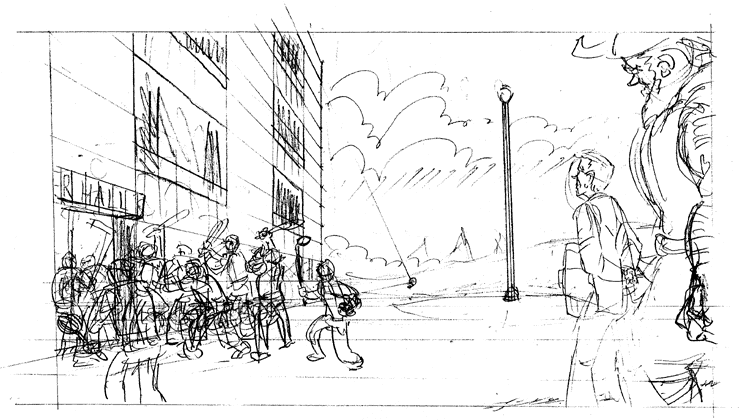 Fig 6a. The pencils for a crowd scene, with sketchy details. |
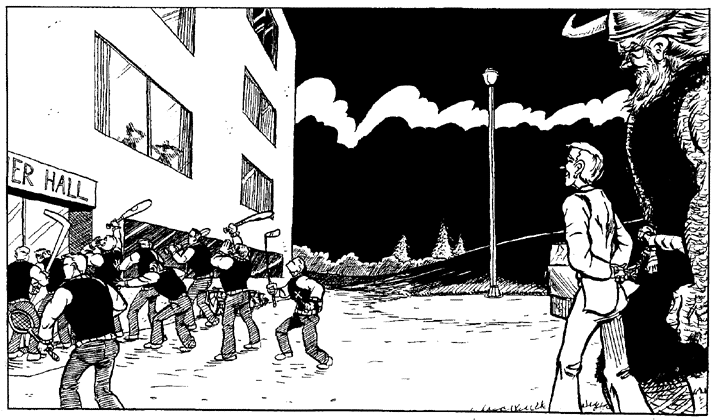 Fig 6b. The final result. |
Once the characters and backgrounds were inked, which meant that I'd gone over all of the pencil lines with permanent ink, I drew the panel borders in, using the ruler with cork backing again. The cork allows you to lift the edge slightly off the paper as you draw the line, which is absolutely necessary for drawing straight lines with india ink. Otherwise, the ink leaks underneath the ruler as you draw the line, and comes out as a horrendous smear.
It took literally years for me to figure out a good technique for drawing panel borders, which amazed me. The straightedge tended to slip around, or the nib ran out of ink halfway through the line, or I muffed up the corners instead of making them sharp, or who knows what else. I would have thought that after drawing a couple hundred panel borders, a technique, a routine that I wouldn't even have to think about consciously, would have manifested itself. But, no. Each time I drew a panel border, it wa a new guessing game.
I also note that panel borders are the only lines I drew with a straightedge for ACX. Anything else -- all straight lines within the artwork -- were done with a steady freehand. In practice, this means that there were no straight lines, only wobbly ones. I like to look at it as giving the artwork kind of an organic quality. Take a look at the buildings and sidewalks in the series and you'll see what I mean.

Next: Erasing and Finishes